Category:Area screenshots: Difference between revisions
Jump to navigation
Jump to search
>FaceLicker (Created page with "Category:Images") |
>Vinifera7 m (category) |
||
| Line 1: | Line 1: | ||
[[Category: | [[Category:Screenshots]] | ||
Latest revision as of 00:50, 9 July 2013
Subcategories
This category has the following 2 subcategories, out of 2 total.
C
D
- Delve biome screenshots (7 F)
Media in category "Area screenshots"
The following 200 files are in this category, out of 474 total.
(previous page) (next page)-
 Abandoned Dam area screenshot.jpg 1,920 × 1,138; 572 KB
-
 Abandoned Dam area screenshot.png 1,920 × 1,138; 2.75 MB
-
 Abandoned Dam Boss.png 1,920 × 1,138; 2.96 MB
-
 Absence of Value and Meaning area screenshot.png 1,679 × 944; 1.78 MB
-
 Abyssal Sanctum area screenshot.jpg 1,101 × 877; 234 KB
-
 Academy Map area screenshot.png 938 × 1,008; 1.67 MB
-
 Acid Caverns Map (Atlas of Worlds) area screenshot.png 1,920 × 1,080; 3.34 MB
-
 Acton's Nightmare area screenshot.jpg 1,239 × 876; 250 KB
-
 Al-Hezmin arena.png 1,920 × 1,056; 2.68 MB
-
 Aliras Camp.png 1,440 × 900; 2.96 MB
-
 All at Sea Hideout area screenshot.jpg 590 × 321; 18 KB
-
 Alleyways Map area screenshot.jpg 1,272 × 826; 314 KB
-
 Alpine Hideout area screenshot.jpg 590 × 321; 57 KB
-
 Altar of Sacrifice Tier 3 Altar and Ahuana.png 826 × 602; 891 KB
-
 Ancient Catacomb area screenshot.jpg 1,920 × 1,080; 599 KB
-
 Ancient Reliquary area screenshot.jpg 1,280 × 720; 242 KB
-
 Arachnid Nest Map (War for the Atlas) area screenshot.png 1,920 × 1,080; 3.08 MB
-
 Arachnid Nest Map area screenshot.png 1,096 × 778; 1.14 MB
-
 Arachnid Tomb Map area screenshot.png 1,210 × 696; 970 KB
-
 Arboreal Hideout area screenshot.jpg 590 × 321; 63 KB
-
 Arcade Map (War for the Atlas) area screenshot.png 1,920 × 1,080; 4.54 MB
-
 Arcade Map area screenshot.png 1,280 × 809; 1.53 MB
-
 ArcaneChambers1.png 1,600 × 900; 2.22 MB
-
 Arena Map area screenshot.png 1,920 × 1,080; 2.58 MB
-
 Arena Map example layout.png 960 × 704; 238 KB
-
 Arid Lake Map (War for the Atlas) area screenshot.png 1,920 × 1,080; 3.91 MB
-
 Arid Lake Map area screenshot.png 1,134 × 806; 1.35 MB
-
 Armoury Map (War for the Atlas) area screenshot.png 1,920 × 1,080; 2.75 MB
-
 Armoury Map area screenshot.png 1,425 × 635; 1.05 MB
-
 Arsenal Map area screenshot.jpg 1,432 × 756; 333 KB
-
 Aspirant's Trial reward room.png 3,005 × 740; 2.99 MB
-
 Aspirants' Plaza area screenshot.jpg 1,238 × 586; 355 KB
-
 Atoll Map (War for the Atlas) area screenshot.png 1,920 × 1,080; 3.69 MB
-
 Atoll Map area screenshot.png 1,281 × 770; 1.28 MB
-
 Augmented Distant Memory area screenshot.jpg 1,428 × 803; 336 KB
-
 Augmented Distant Memory layout.png 1,245 × 970; 2.51 MB
-
 Azurite Cavern Hideout area screenshot.jpg 590 × 321; 57 KB
-
 Azurite Cavity (encounter).png 1,598 × 1,023; 2.91 MB
-
 Azurite Cavity.png 1,536 × 1,011; 2.67 MB
-
 Azurite Mine Encampment (Endless Delve) area screenshot.png 1,920 × 1,080; 3.05 MB
-
 Azurite Mine Encampment area screenshot.png 1,920 × 1,080; 3.03 MB
-
 Backstreet Hideout area screenshot.jpg 590 × 321; 80 KB
-
 Baleful Hideout area screenshot.jpg 590 × 321; 54 KB
-
 Barrows Map (War for the Atlas) area screenshot.png 1,920 × 1,080; 3.99 MB
-
 Barrows Map area screenshot.png 1,023 × 755; 1.13 MB
-
 Basilica Annex - layout.png 881 × 706; 957 KB
-
 Basilica Halls area screenshot.jpg 1,530 × 861; 153 KB
-
 Battle-scarred Hideout area screenshot.jpg 590 × 321; 92 KB
-
 Bazaar Map example layout.png 1,024 × 960; 940 KB
-
 Beach Map (War for the Atlas) area screenshot.png 1,920 × 1,080; 4.13 MB
-
 Beach Map area screenshot.png 1,064 × 852; 1.22 MB
-
 Belfry Map area screenshot.jpg 1,210 × 833; 318 KB
-
 Bone Crypt Map area screenshot.jpg 914 × 737; 202 KB
-
 Boundless Skies Hideout area screenshot.jpg 590 × 321; 15 KB
-
 Brutal Hideout area screenshot.jpg 590 × 321; 34 KB
-
 Bunker area screenshot.png 1,382 × 760; 1.17 MB
-
 Caer Blaidd, Wolfpack's Den area screenshot.jpg 1,209 × 958; 173 KB
-
 Caldera Map area screenshot.jpg 1,204 × 813; 252 KB
-
 Canyon Map (War for the Atlas) area screenshot.png 1,920 × 1,080; 4.31 MB
-
 Canyon Map area screenshot.png 935 × 874; 1.12 MB
-
 Carcass Map area screenshot.png 1,439 × 1,077; 2.56 MB
-
 Cartographer's Hideout area screenshot.jpg 590 × 321; 54 KB
-
 Castle Ruins Map (War for the Atlas) area screenshot.png 1,920 × 1,080; 4.41 MB
-
 Castle Ruins Map area screenshot.png 1,043 × 830; 1.32 MB
-
 Celestial Hideout area screenshot.jpg 590 × 321; 59 KB
-
 Celestial Nebula Hideout area screenshot.jpg 590 × 321; 29 KB
-
 Cells Map area screenshot.jpg 822 × 649; 170 KB
-
 Cells Map example layout.png 768 × 544; 367 KB
-
 Cemetery Map area screenshot.jpg 950 × 836; 187 KB
-
 Chamber of Iron.png 843 × 632; 938 KB
-
 Champion's Hideout area screenshot.jpg 590 × 321; 49 KB
-
 Chateau Map area screenshot.jpg 756 × 938; 232 KB
-
 Chateau Map example layout.png 1,024 × 1,024; 799 KB
-
 City Square Map area screenshot.jpg 1,070 × 772; 251 KB
-
 CloudedRidge1.png 1,440 × 810; 2.71 MB
-
 Coastal Hideout area screenshot.jpg 590 × 321; 79 KB
-
 Cold River Map area screenshot.jpg 1,230 × 840; 330 KB
-
 Colonnade Map area screenshot.jpg 1,390 × 835; 310 KB
-
 Colosseum Map area screenshot.jpg 1,676 × 792; 383 KB
-
 ConcealedCavityBoss0.JPG 1,600 × 900; 203 KB
-
 Conservatory Map area screenshot.jpg 1,133 × 826; 248 KB
-
 Contract underbelly layout.png 1,169 × 846; 1.67 MB
-
 Coral Hideout area screenshot.jpg 590 × 321; 71 KB
-
 Coral Ruins Map area screenshot.jpg 1,584 × 786; 383 KB
-
 Core Map area screenshot.jpg 1,085 × 872; 278 KB
-
 Corrupted Hideout area screenshot.jpg 590 × 321; 35 KB
-
 Courtyard Map area screenshot.jpg 1,255 × 823; 392 KB
-
 Covered-upHollow1.png 1,600 × 900; 1.76 MB
-
 CoveredUpHollow1.png 1,920 × 1,080; 2.34 MB
-
 Coves Map area screenshot.jpg 972 × 729; 195 KB
-
 Crater Map (Betrayal) layout.png 1,920 × 1,080; 3.35 MB
-
 Crater Map area screenshot.jpg 1,052 × 859; 283 KB
-
 Crimson Temple Map area screenshot.jpg 903 × 859; 218 KB
-
 Crimson Township Map area screenshot.jpg 1,225 × 790; 322 KB
-
 Crucible Hideout area screenshot.jpg 590 × 321; 60 KB
-
 Crystal Ore Map area screenshot.jpg 1,273 × 930; 304 KB
-
 Cursed Crypt Map area screenshot.jpg 1,099 × 834; 227 KB
-
 Daresso's Dream area screenshot.jpg 1,595 × 812; 368 KB
-
 Defiled Cathedral Map area screenshot.jpg 1,503 × 939; 357 KB
-
 Desert Hideout area screenshot.jpg 590 × 321; 88 KB
-
 Desert Spring Map area screenshot.jpg 1,186 × 821; 345 KB
-
 Desolate Isle area screenshot.png 1,998 × 966; 2.7 MB
-
 Dig Map area screenshot.jpg 1,146 × 802; 259 KB
-
 Disused Furnace area screenshot.png 1,920 × 1,080; 2.26 MB
-
 Divided Hideout area screenshot.jpg 590 × 321; 39 KB
-
 Doomguard Hideout area screenshot.jpg 590 × 321; 49 KB
-
 Dry Sea Map area screenshot.jpg 1,387 × 796; 365 KB
-
 Dunes Map area screenshot.jpg 885 × 885; 243 KB
-
 Dungeon Map area screenshot.jpg 1,197 × 850; 271 KB
-
 Eclipsed Hideout area screenshot.jpg 590 × 321; 55 KB
-
 Empty hideout.jpg 1,920 × 1,080; 411 KB
-
 Endless Sands Hideout area screenshot.jpg 590 × 321; 33 KB
-
 Enlightened Hideout area screenshot.jpg 590 × 321; 51 KB
-
 Enlightened Hideout area screenshot.png 1,280 × 800; 934 KB
-
 Entombed Alcove area screenshot.png 1,710 × 962; 1.68 MB
-
 Entombed Chamber area screenshot.png 1,707 × 961; 1.95 MB
-
 Entombed Hideout area screenshot.jpg 590 × 321; 38 KB
-
 Eternal Wasteland Hideout area screenshot.jpg 590 × 321; 37 KB
-
 Evacuated Quarter area screenshot.png 1,709 × 961; 2.42 MB
-
 Excavated Hideout area screenshot.jpg 590 × 321; 62 KB
-
 Excavation Map area screenshot.jpg 1,437 × 891; 287 KB
-
 Eye of the Storm ladder.png 859 × 589; 887 KB
-
 Factory Map area screenshot.jpg 1,149 × 796; 318 KB
-
 Fields Map area screenshot.jpg 890 × 824; 250 KB
-
 Flooded Complex area screenshot.png 1,674 × 942; 2.51 MB
-
 Flooded Complex entrance.png 858 × 643; 913 KB
-
 Flooded Mine Map area screenshot.jpg 931 × 821; 189 KB
-
 Forbidden Archives area screenshot.png 1,696 × 953; 1.83 MB
-
 Forbidden Chamber boss Haviri.jpg 1,920 × 1,080; 1.45 MB
-
 Forbidden Chamber entr.jpg 1,920 × 1,080; 1.53 MB
-
 Forbidden Chamber massive vaal.jpg 1,920 × 1,080; 1.58 MB
-
 Forbidden Woods Map area screenshot.jpg 1,278 × 897; 374 KB
-
 Forge of the Phoenix Map area screenshot.jpg 1,272 × 870; 292 KB
-
 Forgotten Conduit area screenshot.jpg 1,920 × 1,080; 523 KB
-
 Forgotten Gulch area screenshot.png 1,920 × 1,080; 2.81 MB
-
 Forgotten Oubliette area screenshot.jpg 1,920 × 1,080; 479 KB
-
 ForgottenConduit1.png 1,920 × 1,080; 1.95 MB
-
 ForgottenOubliette1.png 1,920 × 1,080; 2.85 MB
-
 Foundry Map area screenshot.png 1,060 × 808; 1.15 MB
-
 Frozen Cabins Map area screenshot.jpg 1,583 × 843; 353 KB
-
 Fungal Hollow Map (Betrayal) layout.png 1,920 × 1,080; 1.93 MB
-
 Fungal Hollow Map area screenshot.jpg 1,198 × 660; 247 KB
-
 Furious Hideout area screenshot.jpg 590 × 321; 41 KB
-
 Geode Map area screenshot.jpg 1,251 × 836; 326 KB
-
 Glacial Expanse Hideout area screenshot.jpg 590 × 321; 41 KB
-
 Glacial Hideout area screenshot.jpg 590 × 321; 32 KB
-
 Glimmerwood Hideout area screenshot.jpg 590 × 321; 53 KB
-
 Grotto Map area screenshot.jpg 1,105 × 799; 178 KB
-
 Hallowed Ground area screenshot.jpg 1,265 × 933; 278 KB
-
 Haunted Hideout area screenshot.jpg 590 × 321; 39 KB
-
 Haunted Mineshaft area screenshot.jpg 1,920 × 1,080; 608 KB
-
 Haunted Tomb area screenshot 1.png 1,920 × 1,080; 3.4 MB
-
 Haunted Tomb area screenshot.png 1,920 × 1,080; 3.59 MB
-
 HauntedMineshaftBoss.png 1,920 × 1,080; 2.5 MB
-
 Heist location Laboratory.png 1,494 × 821; 1.67 MB
-
 Heist location Mansion.png 1,454 × 800; 1.48 MB
-
 Heist location Prohibited Library.png 1,393 × 766; 1.3 MB
-
 Heist location Records Office.png 1,430 × 786; 1.33 MB
-
 Heist location Repository.png 1,440 × 792; 1.43 MB
-
 Heist location Tunnels.png 1,388 × 764; 1.36 MB
-
 Hidden Patch area screenshot.png 1,440 × 810; 2.48 MB
-
 Hideout Haku.jpeg 1,920 × 1,080; 859 KB
-
 Highgate (Act 4) area screenshot.jpg 1,334 × 622; 303 KB
-
 Hillock's room as Intervention leader.png 1,737 × 745; 1.83 MB
-
 Hybridisation Chamber (part).png 854 × 641; 887 KB
-
 Immaculate Hideout area screenshot.jpg 590 × 321; 66 KB
-
 Immortal Syndicate Safehouse.png 1,466 × 880; 1.8 MB
-
 Improved Labyrinth Trial with mod text.png 648 × 638; 686 KB
-
 Improved Labyrinth Trial.png 751 × 648; 826 KB
-
 Indomitable Hideout area screenshot.jpg 590 × 321; 49 KB
-
 Infested Valley Map area screenshot.jpg 1,564 × 848; 303 KB
-
 Infinite Abyss Hideout area screenshot.jpg 590 × 321; 27 KB
-
 InnerGrounds1.png 1,920 × 1,080; 3.19 MB
-
 Innocent Hideout area screenshot.jpg 590 × 321; 46 KB
-
 Inside Arcane Chambers.png 1,920 × 1,080; 3.03 MB
-
 Islands of Devastation area screenshot.png 1,886 × 950; 2.86 MB
-
 Ivory Temple Map area screenshot.png 1,588 × 1,055; 3.28 MB
-
 Jungle Valley Map area screenshot.jpg 1,158 × 929; 362 KB
-
 Kaom's Dream area screenshot.jpg 1,366 × 768; 318 KB
-
 Kaom's Path area screenshot.jpg 1,366 × 768; 372 KB
-
 Kaom's Stronghold area screenshot.jpg 1,366 × 768; 315 KB
-
 Laboratory Map area screenshot.jpg 1,506 × 874; 400 KB
-
 Lair Map area screenshot.jpg 1,063 × 796; 205 KB
-
 Lair of the Hydra Map area screenshot.jpg 1,494 × 873; 338 KB
-
 Leyline Map area screenshot.jpg 1,305 × 707; 312 KB
-
 Lighthouse Map area screenshot.jpg 881 × 917; 234 KB
-
 Lioneye's Watch (Act 1) area screenshot.jpg 1,920 × 1,080; 470 KB
-
 Lioneye's Watch 2 area screenshot.jpg 962 × 663; 227 KB
-
 Lioneye's Watch area screenshot.jpg 1,364 × 942; 322 KB
-
 Lower Submerged Passage.png 1,453 × 1,535; 938 KB
-
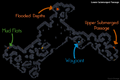 Lower Submerged Passsage Map.png 1,585 × 1,059; 617 KB
-
 Lush Hideout area screenshot.jpg 590 × 321; 107 KB
-
 Luxurious Hideout area screenshot.jpg 590 × 321; 92 KB
-
 Malformation Map area screenshot.jpg 994 × 901; 281 KB
-
 Maligaro's Sanctum area screenshot.jpg 1,920 × 1,080; 963 KB
-
 Mao Kun area screenshot.jpg 1,329 × 863; 253 KB
-
 Map-primordial-pool-ultimatum-1080p.png 1,920 × 1,080; 4.06 MB
-
 Marshes Map area screenshot.jpg 1,153 × 702; 250 KB
-
 Maze Map area screenshot.jpg 1,048 × 723; 207 KB
-
 Maze of the Minotaur Map area screenshot.jpg 1,289 × 857; 264 KB


_area_screenshot.png)


_area_screenshot.png)


_area_screenshot.png)


_area_screenshot.png)

_area_screenshot.png)


_area_screenshot.png)


.png)

_area_screenshot.png)


_area_screenshot.png)


_area_screenshot.png)


_area_screenshot.png)


_area_screenshot.png)


_layout.png)


_layout.png)


_area_screenshot.jpg)

.png)


_area_screenshot.jpg)


